
Setup VPN
1. Create Google VM Instance
2. Open Firewall Port
3. Create VPN Server
Hostname, VPN Username, Passwordstrongvpn.sh to local and check all folder are already.$ sudo chmod +x install.sh
$ sudo ./install.sh↓Auto-detect
Apache
Bash
C#
C++
CSS
CoffeeScript
Diff
Go
HTML, XML
HTTP
JSON
Java
JavaScript
Kotlin
Less
Lua
Makefile
Markdown
Nginx
Objective-C
PHP
Perl
Properties
Python
Ruby
Rust
SCSS
SQL
Shell Session
Swift
TOML, also INI
TypeScript
YAML
Plaintext
Admin
1. Install
$ sudo apt-get install -y zip↓Auto-detect
Apache
Bash
C#
C++
CSS
CoffeeScript
Diff
Go
HTML, XML
HTTP
JSON
Java
JavaScript
Kotlin
Less
Lua
Makefile
Markdown
Nginx
Objective-C
PHP
Perl
Properties
Python
Ruby
Rust
SCSS
SQL
Shell Session
Swift
TOML, also INI
TypeScript
YAML
Plaintext
strongvpn.zip to local and check all folder are already.$ sudo unzip strongvpn.zip↓Auto-detect
Apache
Bash
C#
C++
CSS
CoffeeScript
Diff
Go
HTML, XML
HTTP
JSON
Java
JavaScript
Kotlin
Less
Lua
Makefile
Markdown
Nginx
Objective-C
PHP
Perl
Properties
Python
Ruby
Rust
SCSS
SQL
Shell Session
Swift
TOML, also INI
TypeScript
YAML
Plaintext
Hostname, Shared Secret Key$ sudo chmod +x install.sh$ sudo ./install.sh↓Auto-detect
Apache
Bash
C#
C++
CSS
CoffeeScript
Diff
Go
HTML, XML
HTTP
JSON
Java
JavaScript
Kotlin
Less
Lua
Makefile
Markdown
Nginx
Objective-C
PHP
Perl
Properties
Python
Ruby
Rust
SCSS
SQL
Shell Session
Swift
TOML, also INI
TypeScript
YAML
Plaintext
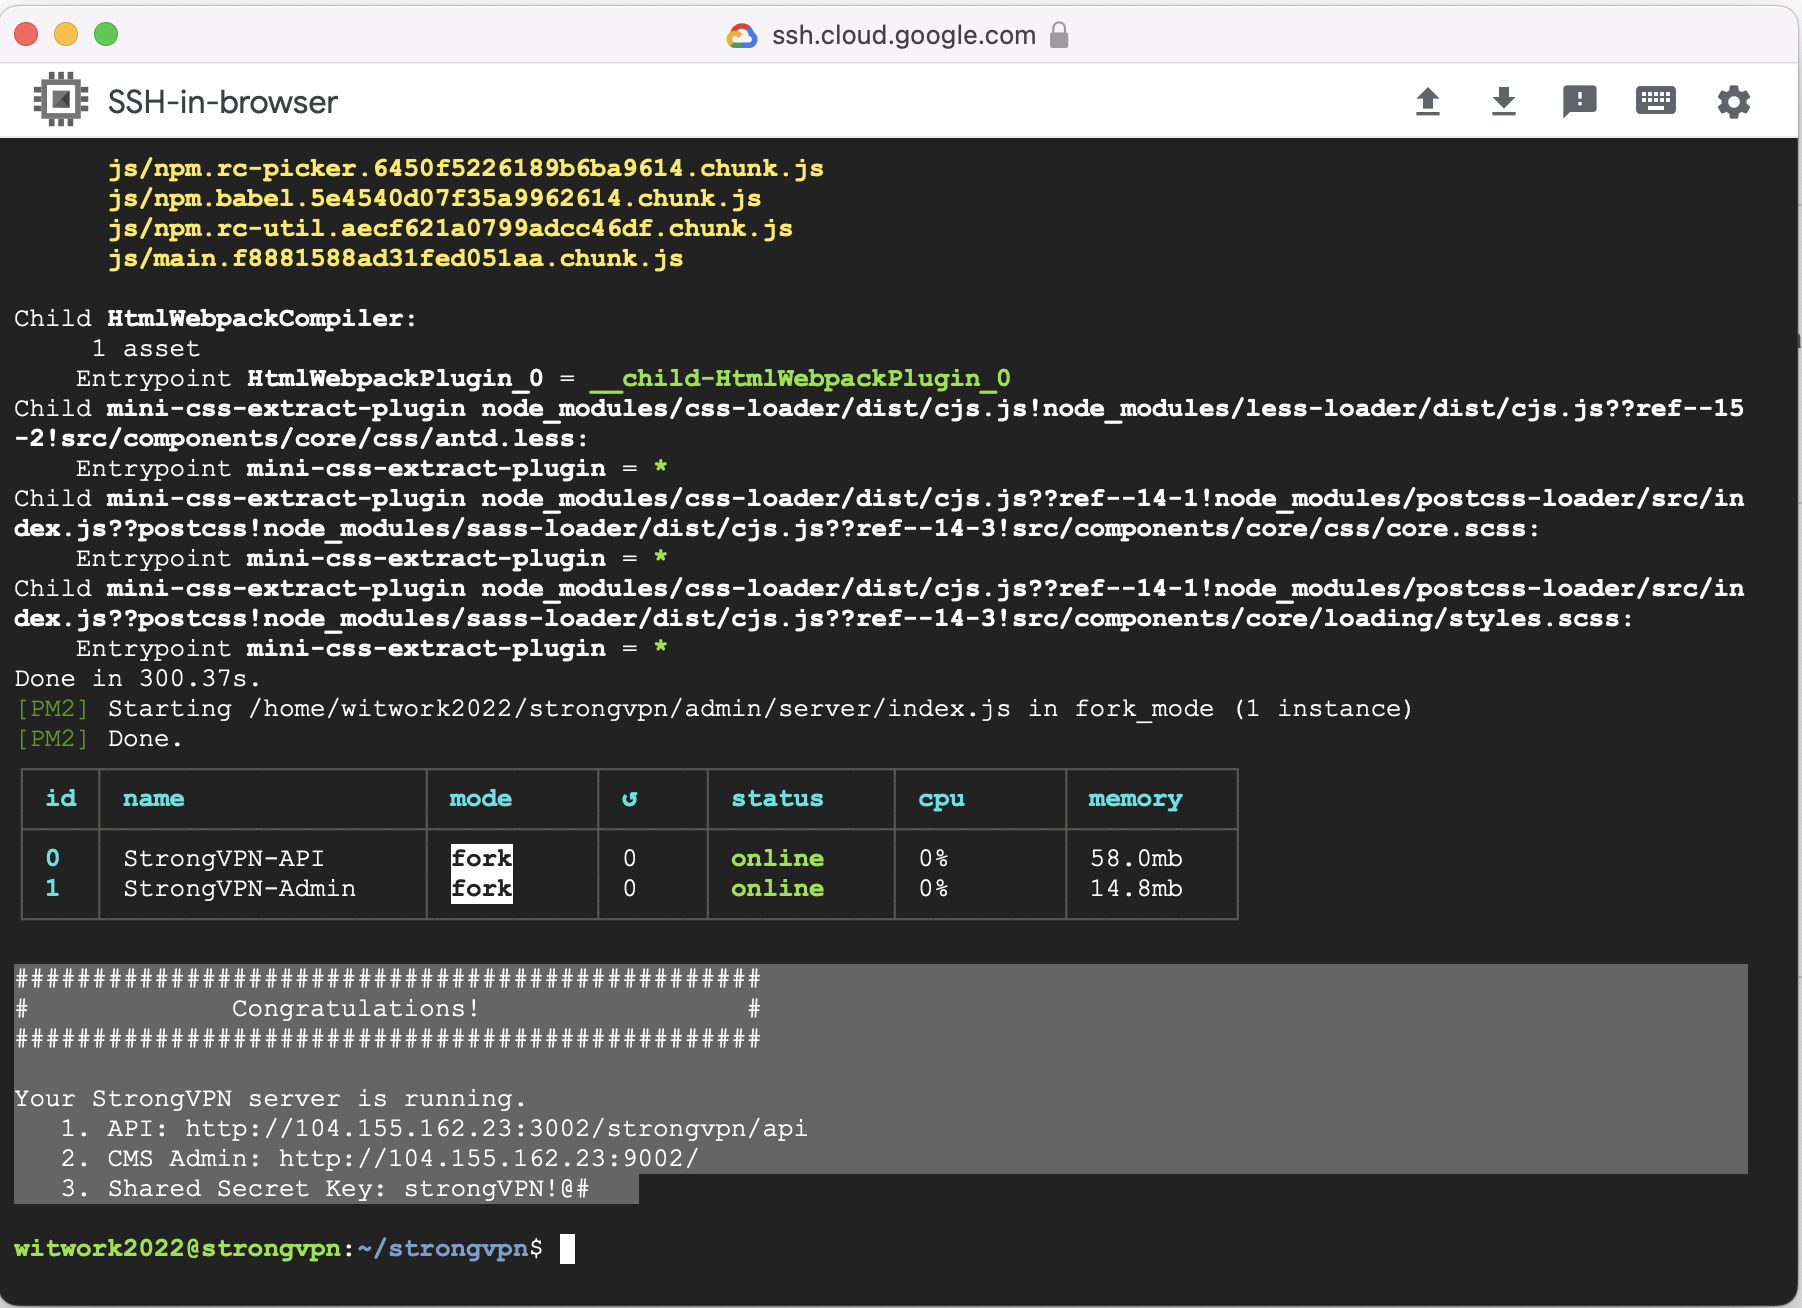
2. Result
3. Signup Admin Account
3. Upload VPN file
Setup Android
1. Set API
build.gradlebase_url http://104.155.162.23:3002/strongvpn/api/ is API Server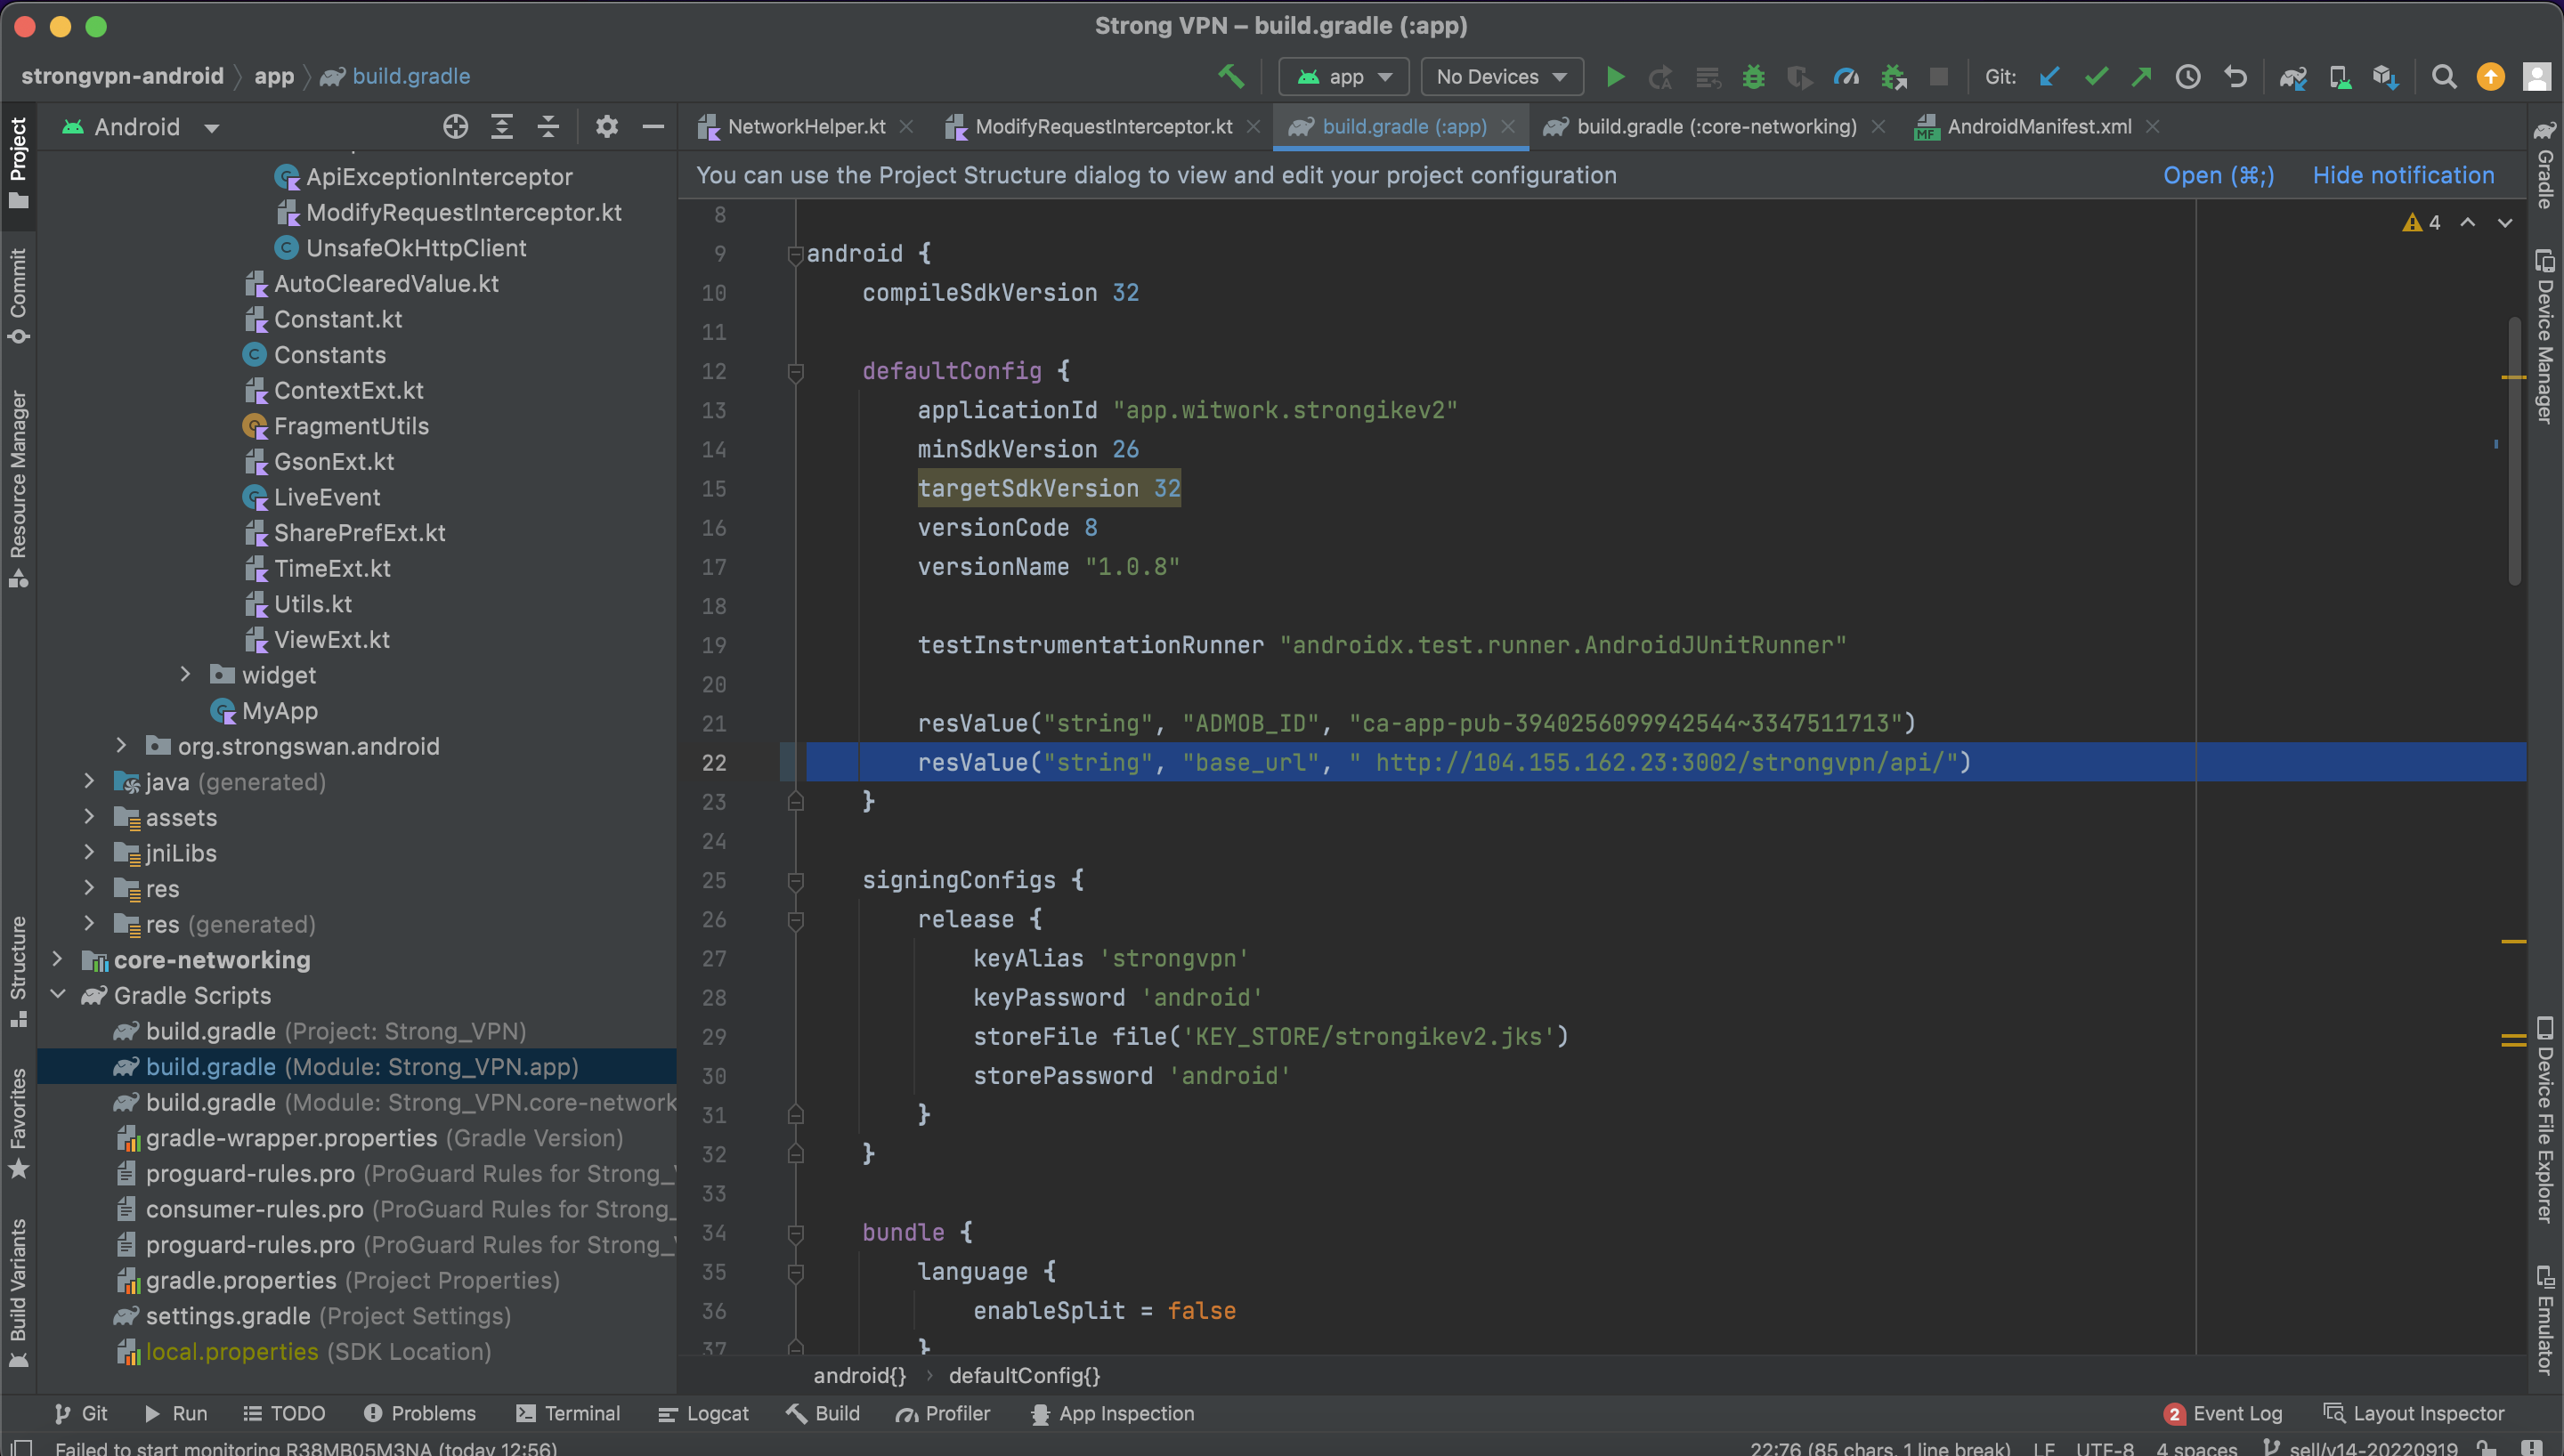
2. Set Shared Secret Key
app > java > com.witvpn.ikev2 > presentation > utils > interceptorshared_secret_key to strongVPN!@# in 1.Install FINAL RESULT Section
Your StrongVPN server is running.
...
3. Shared Secret Key: strongVPN!@#
...↓Auto-detect
Apache
Bash
C#
C++
CSS
CoffeeScript
Diff
Go
HTML, XML
HTTP
JSON
Java
JavaScript
Kotlin
Less
Lua
Makefile
Markdown
Nginx
Objective-C
PHP
Perl
Properties
Python
Ruby
Rust
SCSS
SQL
Shell Session
Swift
TOML, also INI
TypeScript
YAML
Plaintext
3. Set Google AdMob
defaultConfig section. Update PUT_YOUR_ADMOB_APP_ID_HERE with your Admod App id

SETUP IOS
1. Set API
Core > WitWork.swift main_url http://104.155.162.23:3002/strongvpn/api is API Server
2. Set Shared Secret Key
Core > WitWork.swiftshared_secret_key to strongVPN!@# in 1.Install FINAL RESULT Section
3. Update Google Admob
Info.plist > GADApplicationIdentifier section. Update PUT_YOUR_ADMOB_APP_ID_HERE with your Admob App id